C# WPF初心者のCoreTweet入門4 別ソリューションを作成し,入門1-3のまとめとWPFの勉強
これはC# WPF初心者のCoreTweet入門3 設定ファイル入出力 - 01647に続く記事.本記事の内容は下記の順序.
- Settings.settings
- MainWindow
- 新設ウィンドウRegistAccountWindow
- WPF
また,前回までのtestCoreTweetプロジェクトのコードは https://gist.github.com/ustreamer-01647/a3c52b6305b2ca938c36.今回はtestCoreTweet2プロジェクトを作成し,そのコードは
https://gist.github.com/ustreamer-01647/e01f0e0e1bc710d27f95/2182f1b8d07a8e93e985ee991ffc565c0254c171.
新しいソリューションを作る.プロジェクトの名前はtestCoreTweet2,ソリューションのディレクトリは作成しない.
Settings.settings
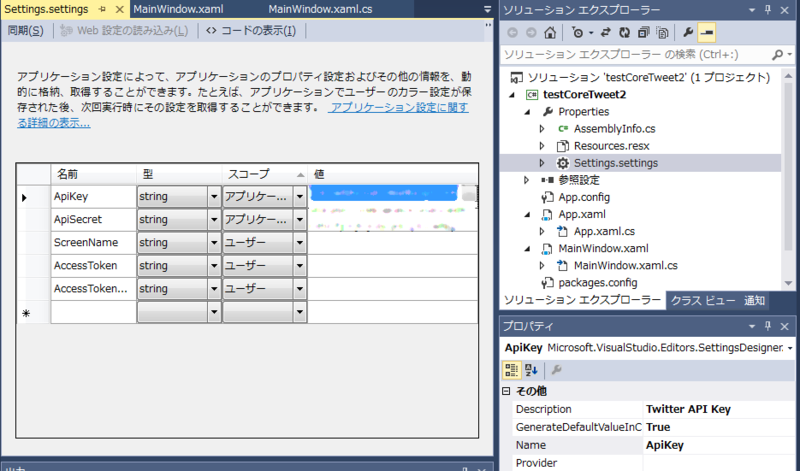
前回まではユーザースコープのみ使用していた.しかし参考文献1,2より,アプリケーションスコープの仕様を学習し,今回から活用する.
MainWindow
フィールドを1個,CoreTweet.Tokens tokensだけを作る.これはTwitter通信で使用する.別クラス「RegistAccountWindow」で書き換えられるよう,internal修飾子を付ける.
コンストラクター
アクセストークンが保管されている場合はそれを読み出し,トークンを組み立てる.そして,スクリーンネーム表示ラベルを更新する.
public MainWindow()
{
    InitializeComponent();

    // トークン組立
    if (!string.IsNullOrEmpty(Properties.Settings.Default.AccessToken)
        && !string.IsNullOrEmpty(Properties.Settings.Default.AccessTokenSecret))
    {
        tokens = Tokens.Create(
            Properties.Settings.Default.ApiKey
            , Properties.Settings.Default.ApiSecret
            , Properties.Settings.Default.AccessToken
            , Properties.Settings.Default.AccessTokenSecret);
        updatescreennameLabel();
    }
}
updatescreennameLabel(string)
これはアプリケーション認証している場合に使用する,スクリーンネームを表示させるためのメソッド.CoreTweet.Tokens tokensと同様に別クラスからもアクセスするため,internal修飾子を付ける.文字「_」は,WPF Label中では特別な意味を持つ.これを打ち消すため,その文字を連続させて反映する.
internal void updatescreennameLabel(string screenName = null)
{
    string _screenName;
    if (string.IsNullOrEmpty(screenName))
    {
        _screenName = Properties.Settings.Default.ScreenName;
        // 未認証時
        if (string.IsNullOrEmpty(_screenName))
        {
            screennameLabel.Content = "unregister";
            return;
        }
    }
    else
    {
        _screenName = screenName;
    }
    // http://msdn.microsoft.com/ja-jp/library/system.windows.controls.label(v=vs.110).aspx
    // WPF Labelにおける文字 _ の仕様について対策する
    screennameLabel.Content = _screenName.Replace("_", "__");
}
registButton_Click(object, RoutedEventArgs)
アプリケーションについてTwitterアカウントを登録するためのウィンドウ「RegistAccountWindow」を開く.事前にオーナー情報を与えている.そして元のウィンドウを操作できないように,ダイアログとして開く.
// Twitter アカウント認証
private void registButton_Click(object sender, RoutedEventArgs e)
{
    var dialog = new RegistAccountWindow();
    dialog.Owner = this;
    // http://msdn.microsoft.com/ja-jp/library/system.windows.window.showdialog(v=vs.110).aspx
    dialog.ShowDialog();
}
registButton_Click(object, RoutedEventArgs)
これはアカウント認証ボタンをクリックした場合の実行内容を記述している.MainWindowをオーナーとした上で,アカウント認証用ウィンドウをダイアログとして開く.
private void registButton_Click(object sender, RoutedEventArgs e)
{
    var dialog = new RegistAccountWindow();
    dialog.Owner = this;
    // http://msdn.microsoft.com/ja-jp/library/system.windows.window.showdialog(v=vs.110).aspx
    dialog.ShowDialog();
}
getTl_Click(object, RoutedEventArgs)
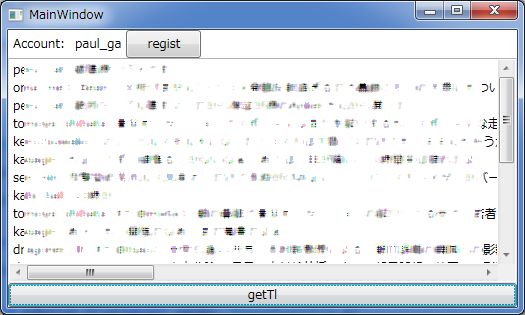
この機能は,アカウント認証後にTwitterアプリケーションらしい動作をさせたいがために設けた.ボタン「getTl」をクリックした場合の実行内容を記述している.テキストボックスの内容を消去し,ホームタイムラインの内容を書き込む.Twitterと通信できない場合に備え,try-catchステートメントを使用する.
private void getTl_Click(object sender, RoutedEventArgs e)
{
    if (tokens != null)
    {
        viewTextBox.Clear();
        try
        {
            foreach (var status in tokens.Statuses.HomeTimeline())
            {
                // http://qiita.com/lambdalice/items/55b1a3d8403ecc603b47#2-4 例1: REST API
                // {ユーザー名}: {投稿内容}{改行}
                viewTextBox.AppendText(string.Format("{0}: {1}{2}"
                    , status.User.ScreenName
                    , status.Text
                    , Environment.NewLine));
            }
        }
        catch (Exception ex)
        {
            viewTextBox.AppendText(ex.Message);
        }
    }
}
新設ウィンドウRegistAccountWindow
フィールドを1個,OAuth.OAuthSession sessionだけを作る.これはPIN認証のために使用する.
Window_ContentRendered(object, EventArgs)
デザイナー画面でウィンドウを選択し,プロパティペインでイベントハンドラー「ContentRendered」を作る(参考文献3,4).アカウント認証について,初期状態にするためのメソッドを実行する.実行機会が複数あるため,メソッドとして独立させている.コンストラクター(あるいはLoaded)でなく,ContentRenderedに記述したのは,registボタンクリック後,とりあえずウィンドウを表示させて見せたいからだ.Twitterとの通信処理が終わるまで表示しないというのは,ユーザーに不安を与えてしまう.
private void Window_ContentRendered(object sender, EventArgs e)
{
    // http://msdn.microsoft.com/ja-jp/library/system.windows.window.contentrendered(v=vs.110).aspx
    initAuthrize();
}
initAuthrize()
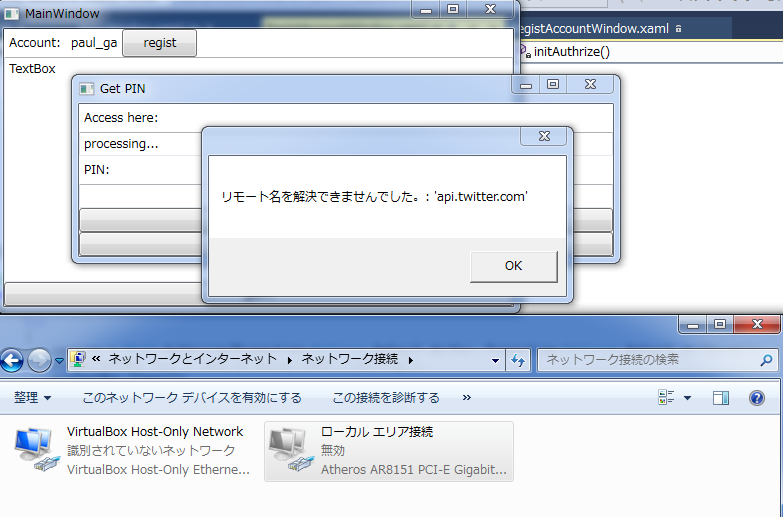
このメソッドはアカウント認証を開始状態にする.ブラウザーオープンする場合はProcess.Start()を使用する.getTl_Click()と同様に,try-catchステートメントを使用する.
private void initAuthrize()
{
    try
    {
        session = OAuth.Authorize(Properties.Settings.Default.ApiKey, Properties.Settings.Default.ApiSecret);
        pinURITextBox.Text = session.AuthorizeUri.ToString();
        pinTextBox.Clear();
        // System.Diagnostics.Process.Start(session.AuthorizeUri.ToString());
    }
    catch (Exception ex)
    {
        MessageBox.Show(ex.Message);
        Close();
    }
}
cancelButton_Click(object, RoutedEventArgs)
キャンセルボタンをクリックした場合,ダイアログを閉じる.
private void cancelButton_Click(object sender, RoutedEventArgs e)
{
    this.Close();
}
okButton_Click(object, RoutedEventArgs)
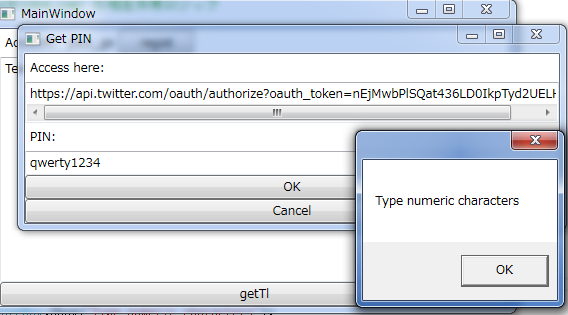
OKボタンをクリックした場合,アカウント認証処理を進める.入力値検査は,Twitterの仕様が変化した場合,これも変更せねばならない.PIN認証結果はMainWindowのtokensに書き込む.それからアプリケーション設定としても保存する.また失敗に備えて,try-catchステートメントを使用している.
private void okButton_Click(object sender, RoutedEventArgs e)
{
    // http://msdn.microsoft.com/ja-jp/library/system.text.regularexpressions.regex.aspx
    // http://msdn.microsoft.com/ja-jp/library/az24scfc.aspx 正規表現言語 - クイック リファレンス
    // PINに数字以外を含む場合,認証に移行しない
    if (string.IsNullOrEmpty(pinTextBox.Text)
        || System.Text.RegularExpressions.Regex.IsMatch(pinTextBox.Text, @"\D"))
    {
        MessageBox.Show("Type numeric characters");
        pinTextBox.Clear();
        return;
    }

    try
    {
        // PIN認証
        MainWindow owner = (MainWindow)this.Owner;
        owner.tokens = session.GetTokens(pinTextBox.Text);
        // トークン保存
        Properties.Settings.Default.AccessToken = owner.tokens.AccessToken;
        Properties.Settings.Default.AccessTokenSecret = owner.tokens.AccessTokenSecret;
        Properties.Settings.Default.ScreenName = owner.tokens.ScreenName;
        Properties.Settings.Default.Save();
        // 表示調整
        owner.updatescreennameLabel(owner.tokens.ScreenName);

        MessageBox.Show("verified: " + owner.tokens.ScreenName);
        Close();
    }
    catch (Exception ex)
    {
        // やり直し
        MessageBox.Show(ex.Message);
        initAuthrize();
    }

}
WPF
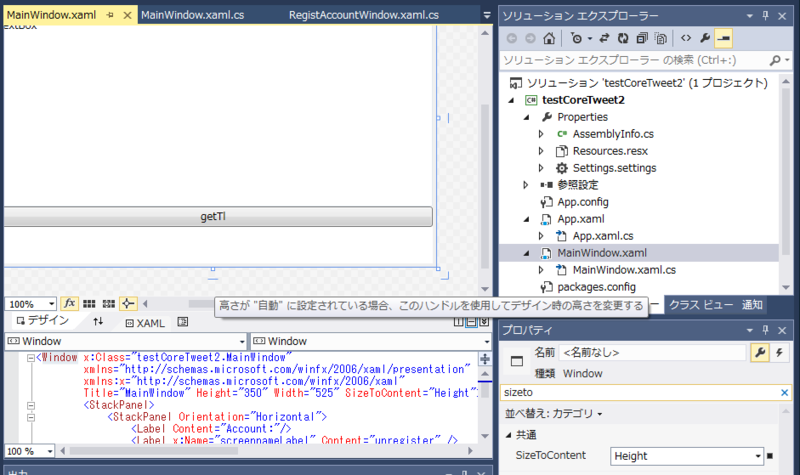
MainWindow.xaml
- 高さ,幅を指定する
- 高さについては,ウィンドウ内容物に応じて伸縮する(SizeToContent)
- ウィンドウ内容物配置を考慮して,DesignHeight属性がある
- この属性指定時,プレフィックスdを付けている
- mc:Ignorable="d" は参考文献5参照
- DesignHeightの立場は以上から,設計にのみ使用される属性
- SizeToContentを設定して,Window要素のHeight属性を除去して,デザイナーでサイズ変更すると出来上がる
- StackPanelを2個使用する
- 内容物を垂直方向(縦,既定)または水平方向(横,Orientation="Horizontal")に積み重ねる
- 私の好みで英字表記している
- viewTextBoxは内容に応じてスクロールバーを表示する
<Window
        xmlns="http://schemas.microsoft.com/winfx/2006/xaml/presentation"
        xmlns:x="http://schemas.microsoft.com/winfx/2006/xaml"
        xmlns:d="http://schemas.microsoft.com/expression/blend/2008"
        xmlns:mc="http://schemas.openxmlformats.org/markup-compatibility/2006"
        mc:Ignorable="d" x:Class="testCoreTweet2.MainWindow"
        Title="MainWindow" Width="525" SizeToContent="Height" d:DesignHeight="345">
    <StackPanel>
        <StackPanel Orientation="Horizontal">
            <Label Content="Account:"/>
            <Label x:Name="screennameLabel" Content="unregister" />
            <Button x:Name="registButton" Content="regist"  Width="75" Click="registButton_Click"/>
        </StackPanel>
        <TextBox x:Name="viewTextBox" Text="TextBox" Height="225"
            VerticalScrollBarVisibility="Auto" HorizontalScrollBarVisibility="Auto" />
        <Button x:Name="getTl" Content="getTl" Click="getTl_Click"/>
    </StackPanel>
</Window>
RegistWindow.xaml
- ContentRendered時点でprocessing...が表示され,initAuthrize()へ進み,URIに置き換わる
- IsDefault要素とIsCancel要素を使用し,それぞれEnterキーとESCキーに関連付く
<Window
        xmlns="http://schemas.microsoft.com/winfx/2006/xaml/presentation"
        xmlns:x="http://schemas.microsoft.com/winfx/2006/xaml"
        xmlns:d="http://schemas.microsoft.com/expression/blend/2008"
        xmlns:mc="http://schemas.openxmlformats.org/markup-compatibility/2006" mc:Ignorable="d"
        x:Class="testCoreTweet2.RegistAccountWindow"
        Title="Get PIN" Width="550" d:DesignHeight="229" SizeToContent="Height"
        ContentRendered="Window_ContentRendered">
    <StackPanel>
        <Label Content="Access here:" />
        <TextBox x:Name="pinURITextBox" HorizontalScrollBarVisibility="Auto" IsReadOnly="True" Text="processing..."/>
        <Label Content="PIN:"/>
        <TextBox x:Name="pinTextBox" />
        <Button x:Name="okButton" Content="OK" IsDefault="True" Click="okButton_Click"/>
        <Button x:Name="cancelButton" Content="Cancel" IsCancel="True" Click="cancelButton_Click"/>

    </StackPanel>
</Window>